
|
|
In August 2025, we introduced AWS User Experience Customization (UXC) capabilities to customize user interfaces (UIs) to meet your unique needs and optimize your workflow. With this capability, your account administrator can customize part of the AWS Management Console UI, such as assigning a color to the AWS account for easy identification.
Today, we’re announcing additional UXC customization capabilities that allow for a specific display of relevant AWS Regions and services for your team members. By hiding unused Sites and services, you can reduce mental load and eliminate unnecessary clicking and scrolling, helping you focus better and work faster. With this release, we provide the ability to customize the account color, Region, and service appearance together.
Sort the account by color
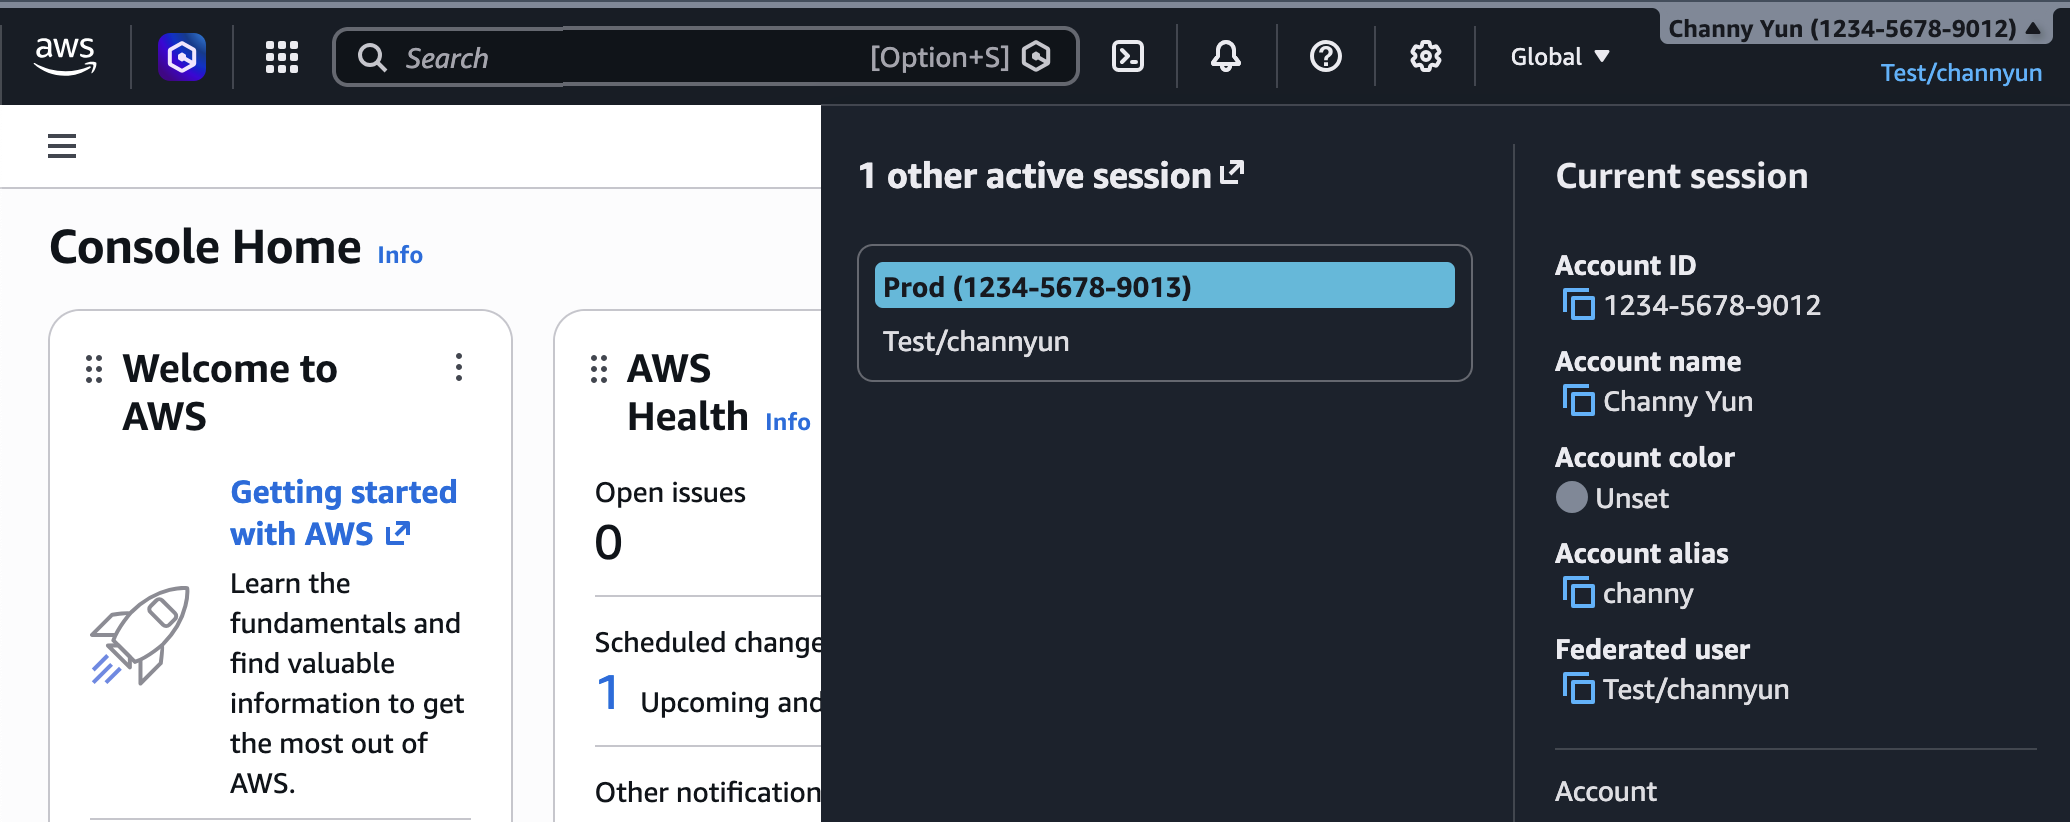
You can set the color of your accounts to distinguish between them. To get started, log in to the AWS Management Console and select your account name in the navigation bar. Your account color has not been set. To set the color, select Account.
To Account display settingschoose the color of the account you like and choose Update. You can see the selected color in the navigation bar.
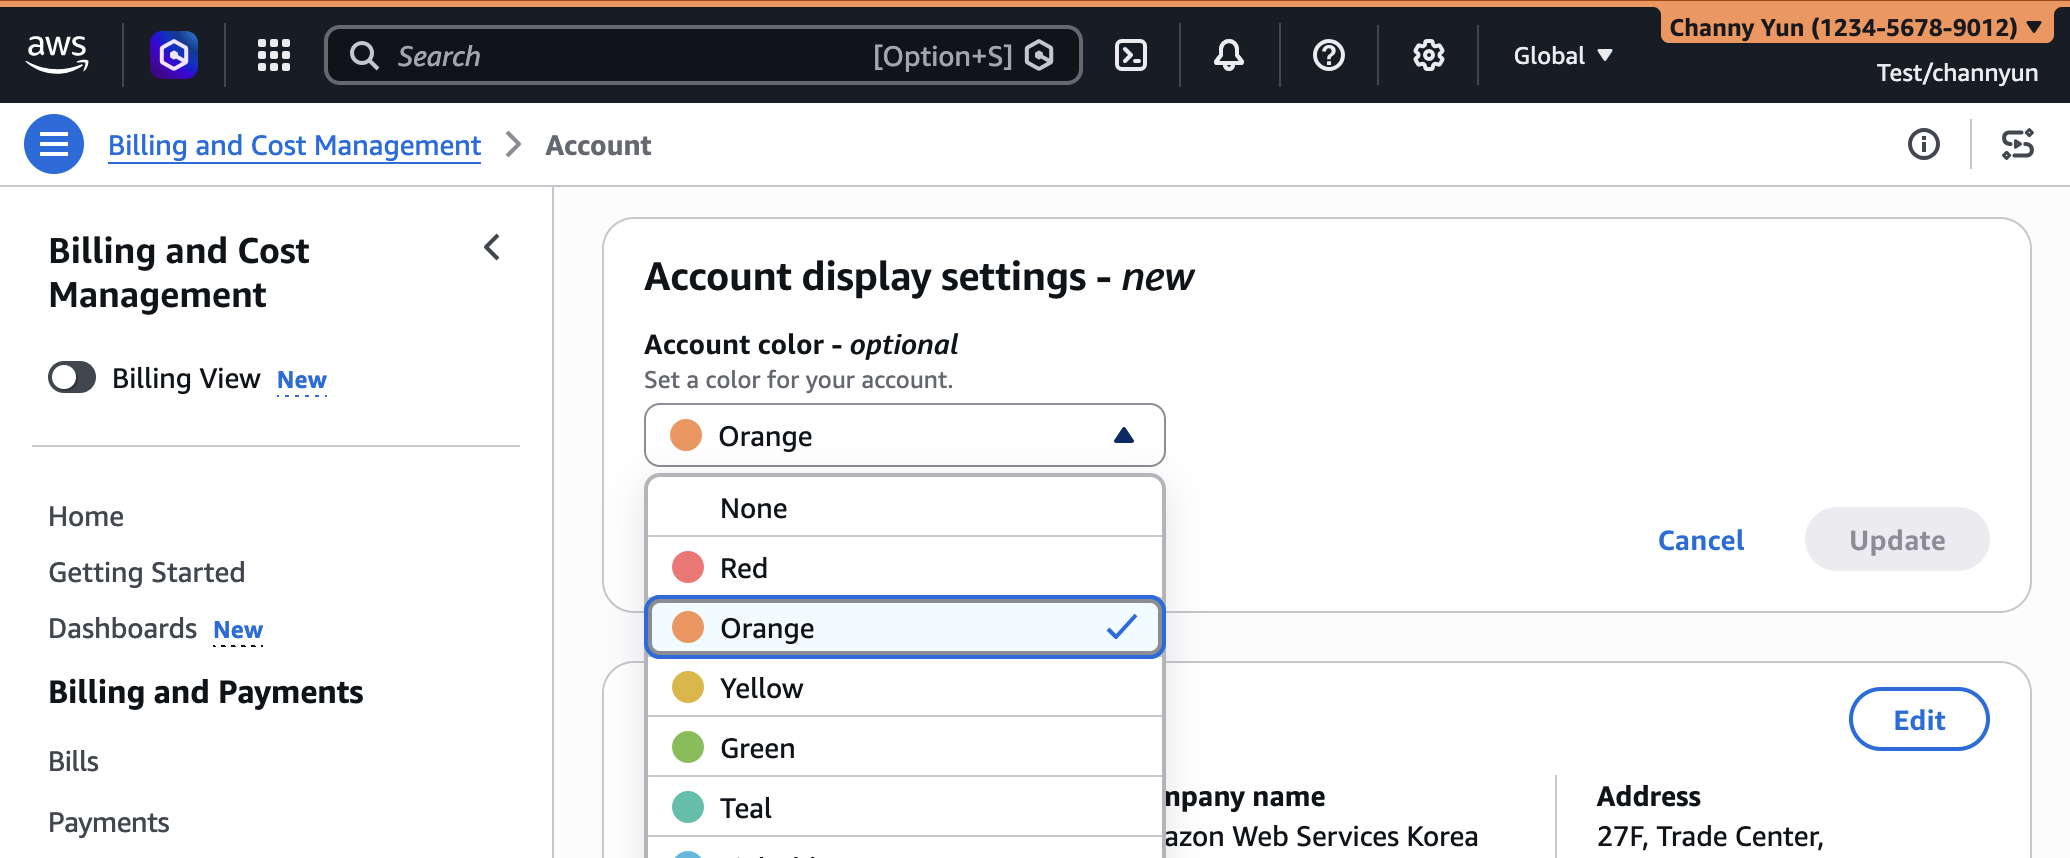
By changing the color of the account, you can clearly identify the purpose of the account. For example, you can use orange for development accounts, light blue for test accounts, and red for production accounts.
Customize sites and service visibility
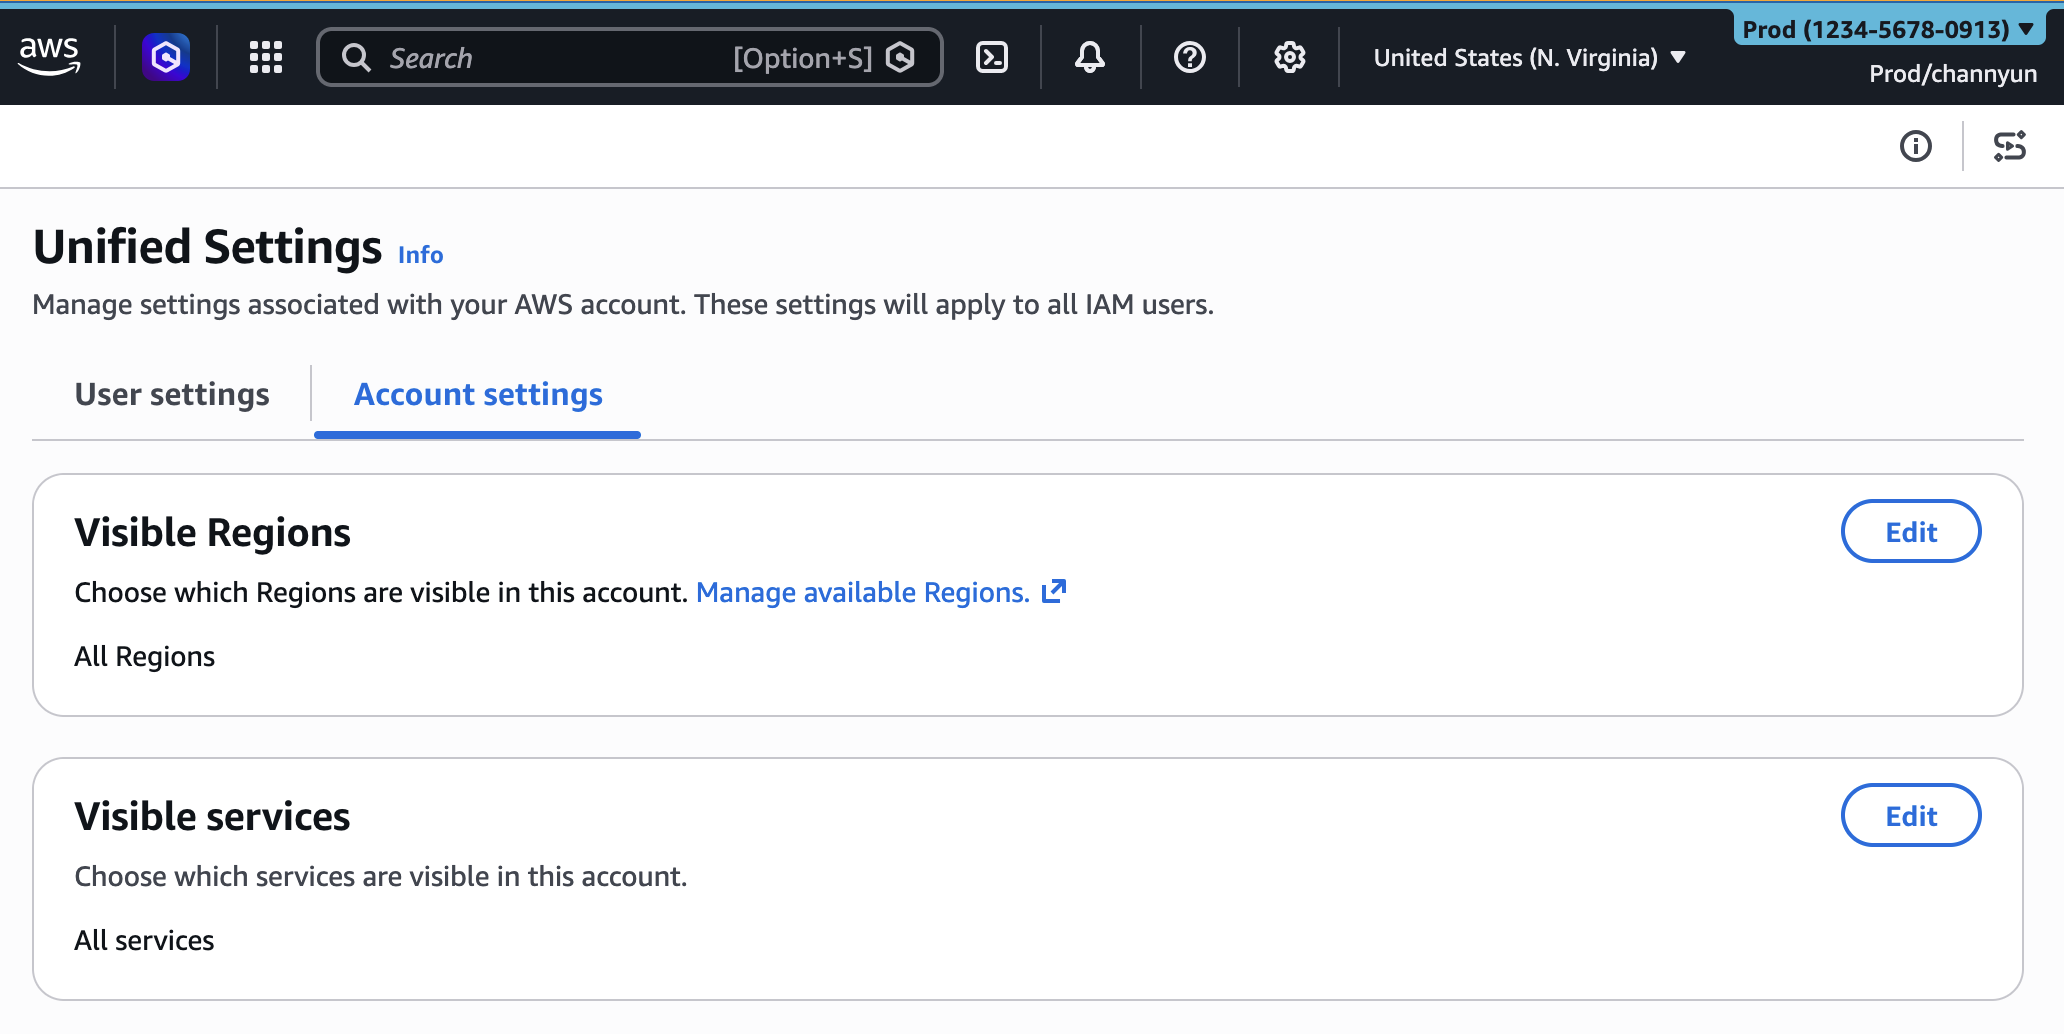
You can control which AWS Regions appear in the Region option or which AWS services appear in the console navigation. In other words, you can set to display only the Sites and services related to your account.
To start, select the gear icon in the navigation bar and select View all user settings. If you are an administrator, you can see the new one Account settings tab in the integrated settings. If you have not adjusted the settings, all Sites and services are visible.
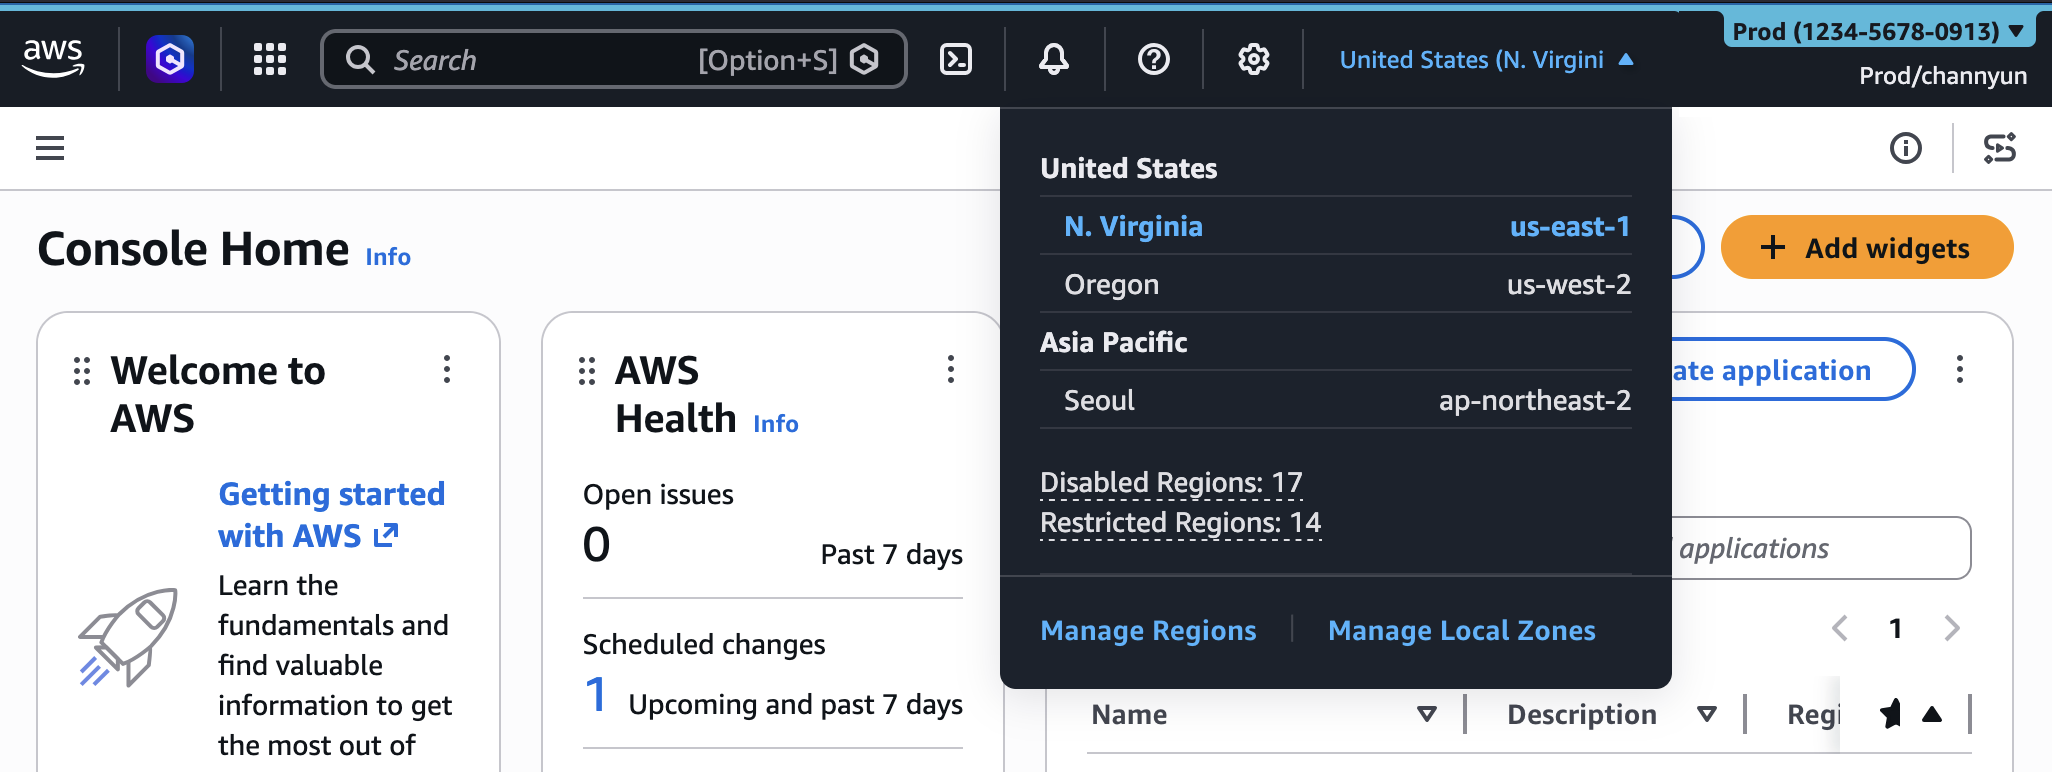
To set Visible areas, select Change to Visible Areas part. Select the Locations you see All places available or Select Locations then prepare your list. Select Save the changes.

After configuring the Region visibility setting, you will only find the Regions selected in the Regions option on the navigation bar in the console.
You can also place visible services in the same way. Search or select services from the group. I used to Popular services group to choose my favourites. When you’re done choosing, choose Save the changes.
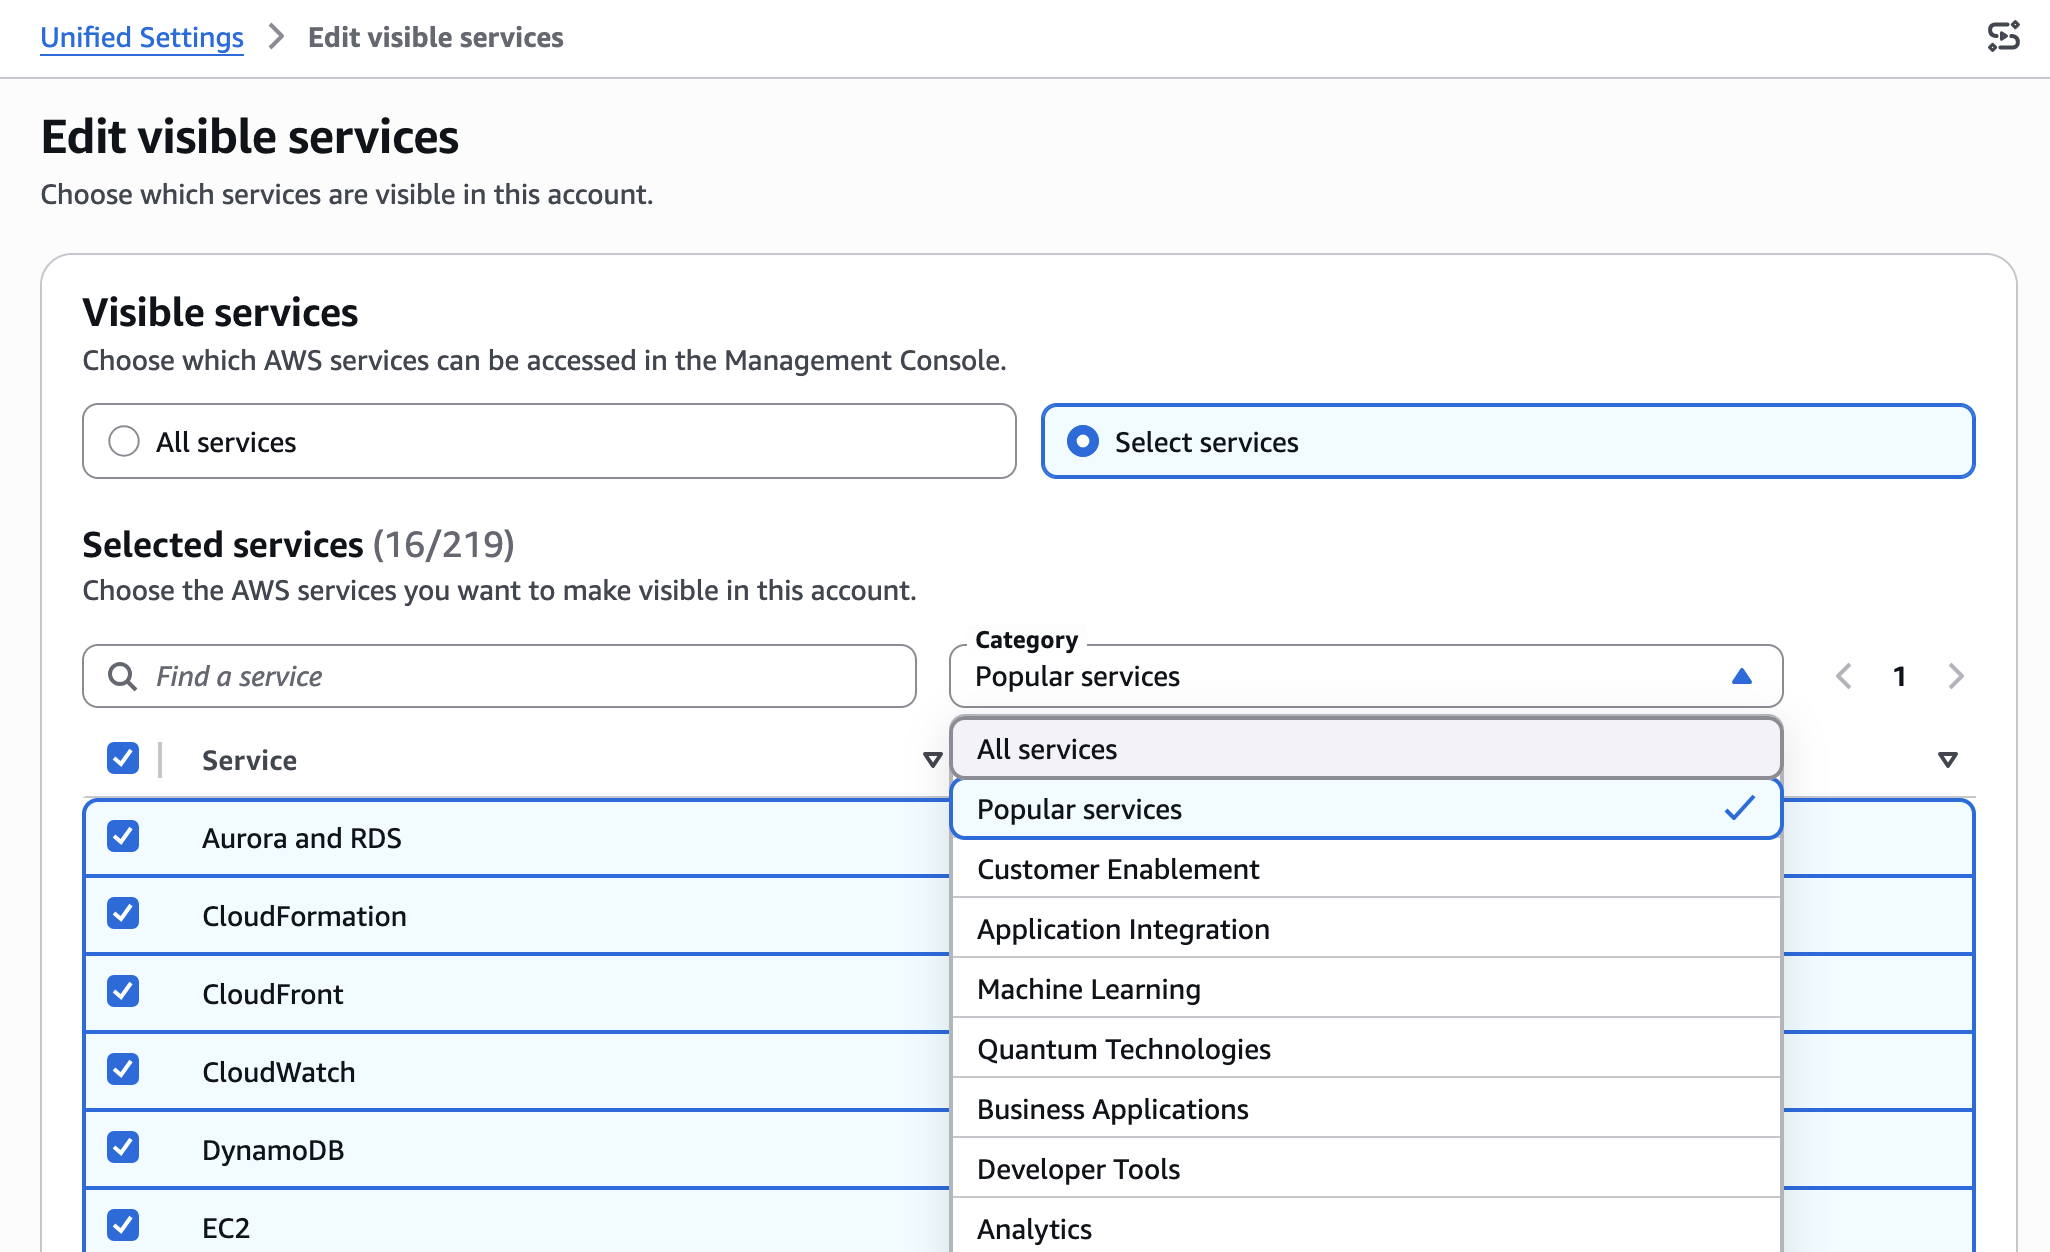
After configuring the visible services, you will find only the selected services in All services menu in the navigation bar.
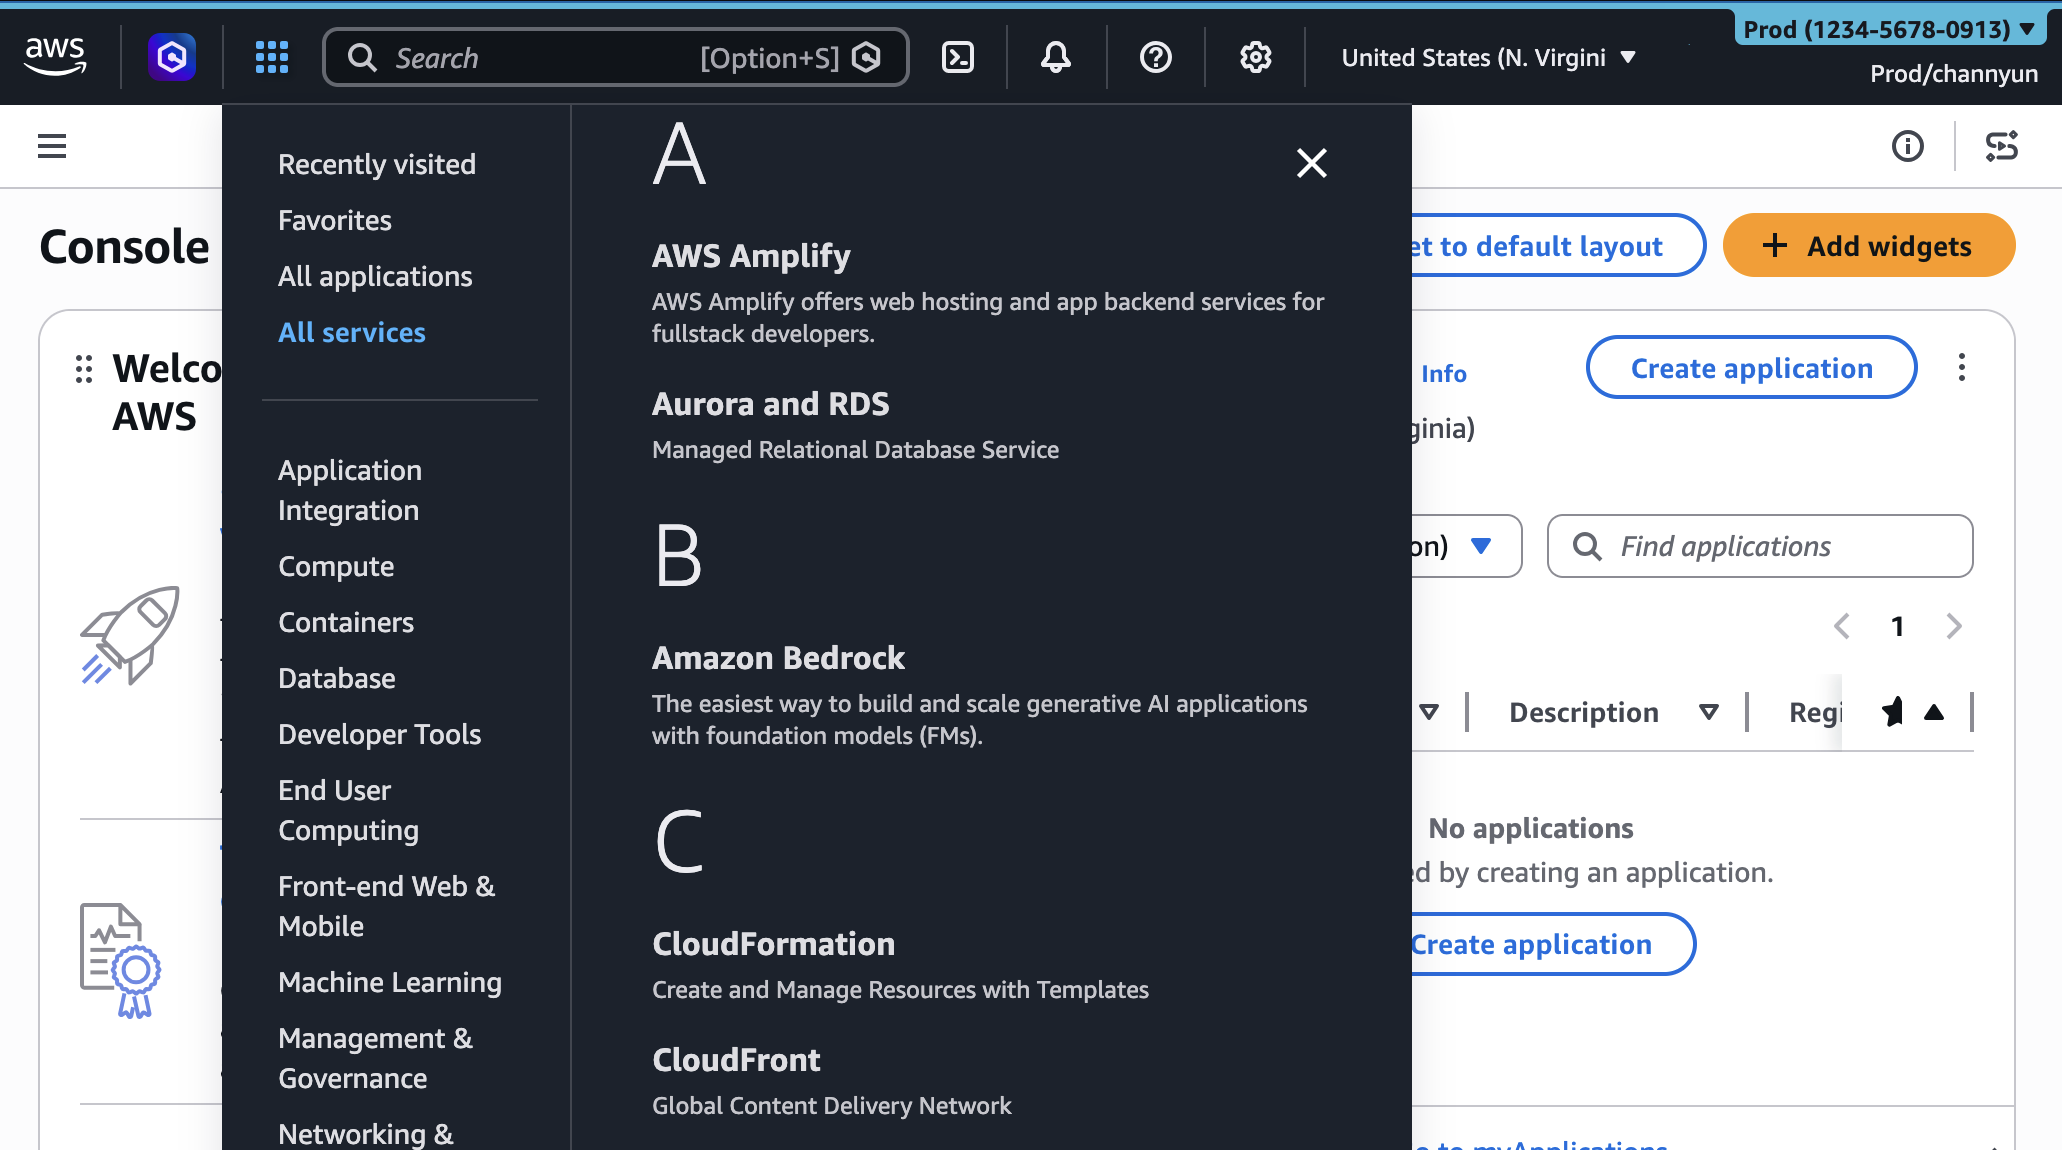
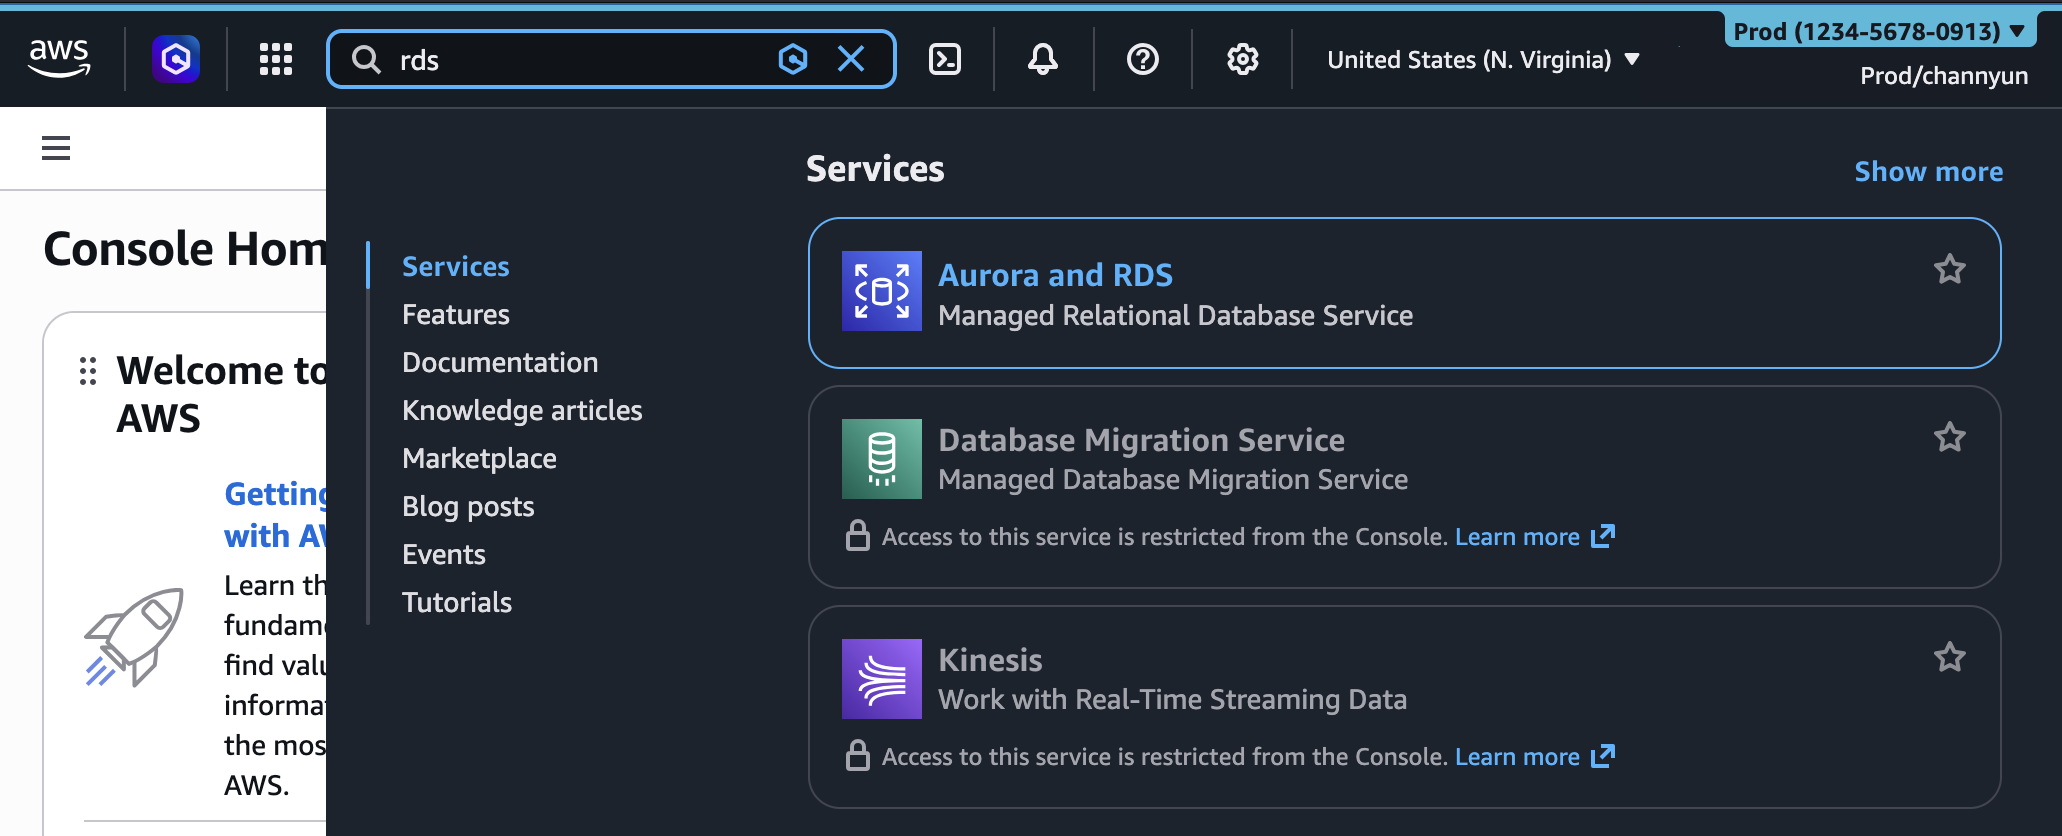
When searching for a service name in the search bar, you can select only selected services.
Fields and service visibility settings only control the visibility of services and Fields in the console. They do not restrict access through the AWS Command Line Interface (AWS CLI), AWS SDKs, AWS APIs, or Amazon Q Developer.
You can also manage these account settings manually with new ones visibleServices and visibleRegions categories. For example, you can use the AWS CloudFormation example:
AWSTemplateFormatVersion: "2010-09-09"
Description: Customize AWS Console appearance for this account

Resources:
  AccountCustomization:
    Type: AWS::UXC::AccountCustomization
    Properties:
      AccountColor: red
      VisibleServices:
        - s3
        - ec2
        - lambda
      VisibleRegions:
        - us-east-1
        - us-west-2
And you can use your own Cloudformation template.
$ aws cloudformation deploy \
  --template-file account-customization.yaml \
  --stack-name my-account-customization
To learn more, visit the AWS User Experience API Reference and the AWS CloudFormation template reference.
Try it out in the AWS Management Console today and give feedback by voting Comments link below the console, posts to the AWS re:Post forum for the AWS Management Console, or to your AWS Support contacts.
— Channy
#Customize #AWS #Management #Console #experience #visual #settings #including #account #color #location #service #visibility #Amazon #Web #Services